Pricing Groups
Configuration > Items > Pricing Groups
Pricing Groups are used to define different sets of prices to use on POS Sales items. When an item is rung up at the POS, TITAN will determine the appropriate price to use based on the pricing group configuration.
-
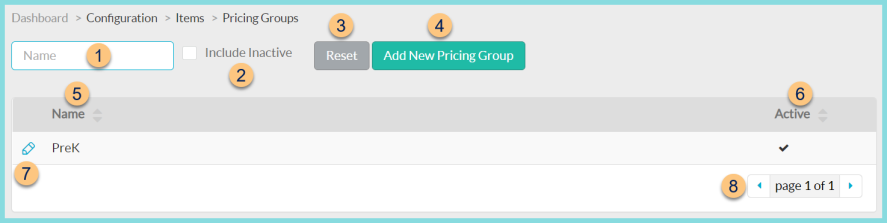
Name - search by name
-
Include Inactive - check to include inactivated groups
-
Reset - click to reset search parameters
-
Add New Pricing Group - click to add a new group
-
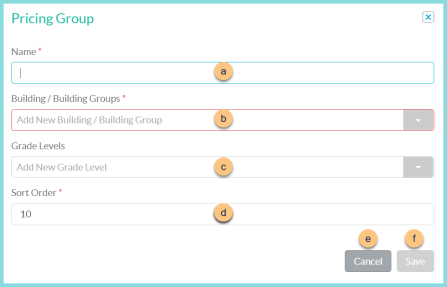
Name - enter pricing group name
-
Building/Building Group - select the applicable building/building groups. If this pricing group applies to the entire district, select All. Note: if building/building groups are selected, the pricing group will apply when the item is sold at the selected building(s).
-
Grade Levels - select the applicable grade levels. Note: This is the most common option and is used to define different prices by grade regardless of where the item is served.
-
Sort Order - change sort order if needed
-
Cancel - click to return to the previous screen without saving changes
-
Save - click to save changes
-
-
Name - click to sort by name
-
Active - click to sort by active status
-
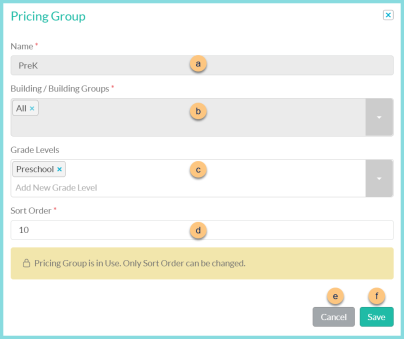
Pencil - click to edit an existing group. Note: If the pricing group is in use, only certain fields can be edited.
-
Name - enter pricing group name
-
Building/Building Group - select the applicable building/building groups. If this pricing group applies to the entire district, select All. Note: if building/building groups are selected, the pricing group will apply when the item is sold at the selected building(s).
-
Grade Levels - select the applicable grade levels. Note: This is the most common option and is used to define different prices by grade regardless of where the item is served.
-
Sort Order - change sort order if needed
Active (not pictured, not in use groups only) - toggle active status
-
Cancel - click to return to the previous screen without saving changes
-
Save - click to save changes
-
-
< > - click to scroll through pages